Want to reset network settings in Windows 11? This HowTrekker tutorial walks you through the process with four clear steps, common mistakes to avoid, and helpful official resources.
Before you begin
These visuals are AI-generated reconstructions of software interfaces, not actual device screenshots. Labels and layouts may vary by software version. Read each step carefully before changing settings.
Warning: A network reset removes saved network configuration and may affect VPNs and virtual adapters. Try simpler fixes before resetting.
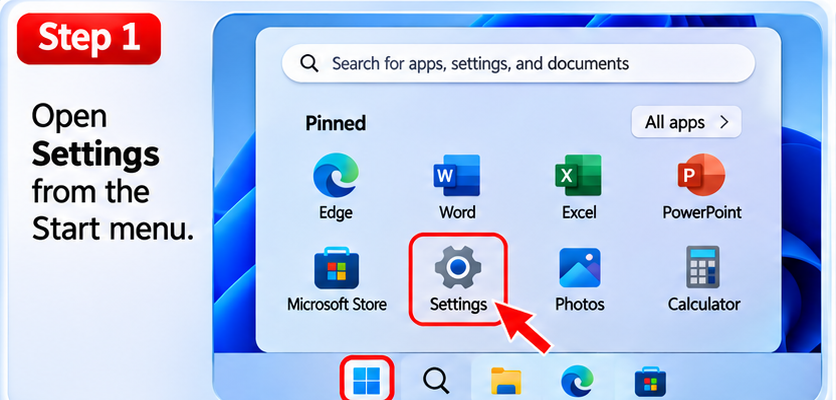
Step 1: Open Settings
Press Windows + I to open Windows Settings. Network reset is a last-resort step; first try reconnecting Wi-Fi or restarting the router.
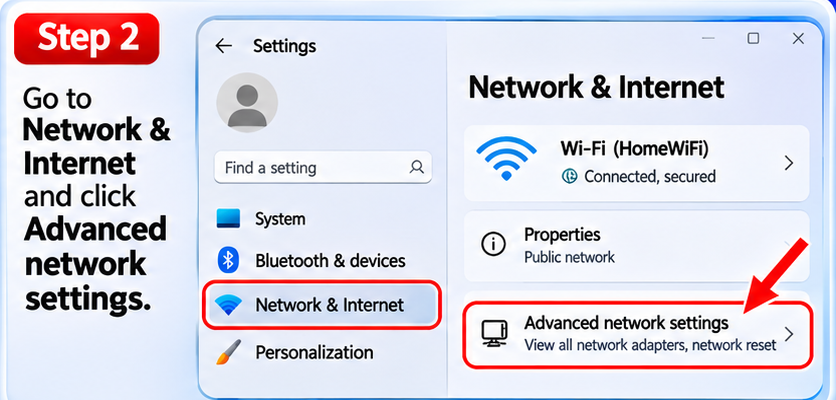
Step 2: Go to advanced network settings
Choose Network & internet, then Advanced network settings.
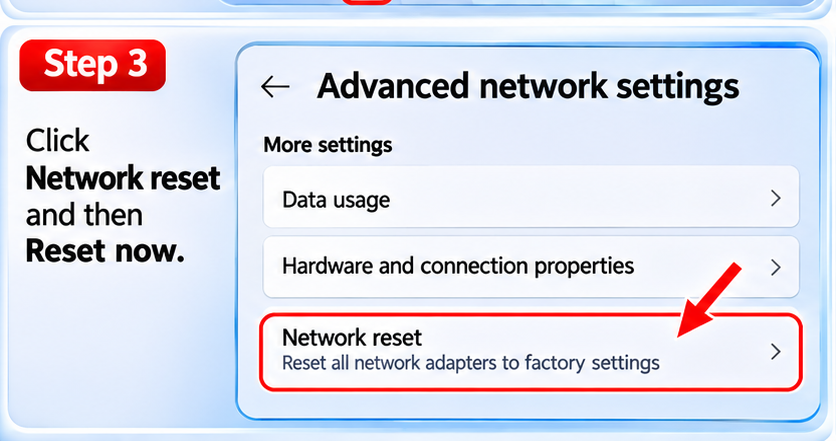
Step 3: Select Network reset
Under More settings, choose Network reset, then select Reset now.
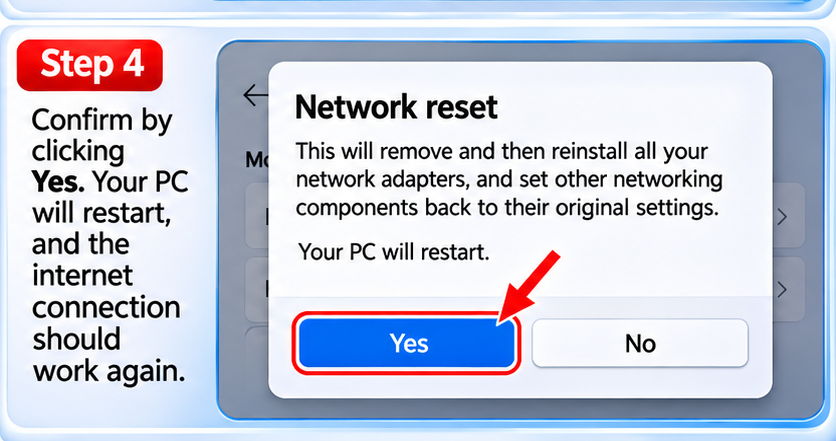
Step 4: Confirm and restart
Confirm the reset when prompted. Windows removes and reinstalls network adapters and restores network settings to defaults; you may need to reconnect Wi-Fi and reconfigure VPN software afterward. The illustration simplifies the confirmation sequence.
Official documentation
For the latest software-specific instructions, see Microsoft: Fix Wi-Fi connection issues.
Related HowTrekker guide
You may also find our guide Speed up Windows 11 helpful. Check that this internal article is published before making this draft live.
Frequently asked questions
Will the interface look exactly like the images?
Not necessarily. The pictures are AI-generated visual examples; the actual menu labels may differ by software release.
What if I cannot find an option?
Check for system updates and search Settings for the named feature. Some features depend on your hardware, app or operating-system version.
Should I make a backup first?
Yes, before any action that could remove files, reset configurations or affect app storage, back up anything important.
Reviewed November 2026.